Digispark ATtiny85, micro USB
- Product Code: db-att85m
- Availability: 2
4.92€
- Ex Tax: 4.00€
Digispark ATtiny85 Development Board
The ATtiny85-based mini development board provides a cost-effective and compact alternative to Arduino, offering slightly less processing power. It is compatible with various shields for enhanced functionality and integrates seamlessly with the familiar Arduino IDE, making it an excellent entry point into microcontroller electronics.
Featuring a built-in USB interface, programming this microcontroller is straightforward and similar to using Arduino, leveraging the well-known Arduino IDE for development. Essentially a Digispark clone, it comes with 6 versatile ports that can be configured through the Arduino IDE. These ports can function as 6 digital I/O pins, 4 analog inputs, or 3 PWM outputs. The board offers flexible power options, operating smoothly with either a micro USB connection or an external power supply ranging from 7 to 16 volts DC.
Technical Specifications:
- Support for the Arduino IDE 1.0+ (OSX/Windows/Linux).
- Power via USB 5V or External Source 7-16V (automatic selection).
- The On-board, 150mA 5V Regulator.
- Built-in USB and serial (was debugging).
- 6 I/O Pins (2 are informs the for USB only if your program actively communicates over USB, otherwise you can use all 6 even if you are programming via USB).
- 8kB Flash Memory (about 6kB after bootloader).
- The I2C and SPI (vis USI).
- PWM on 3 pins (more possible with Software PWM).
- The ADC on 4 pins.
- The Power LED and the Test/Status leds.
Instructions:
- Download the IDE:
Download link: https://www.arduino.cc/en/software/ - Download the USB chip driver:
Download link: (Windows): https://github.com/digistump/DigistumpArduino/releases/ use Digistump.Drivers.zip - Unzip the file and run the installation with DPinst.exe for 32bit Windows, or DPinst64.exe for 64bit Windows.
- Start the Arduino IDE and in the File menu -> Properties, add this line to the Additional Boards Manager URL list: https://raw.githubusercontent.com/digistump/arduino-boards-index/master/package_digistump_index.json or https://github.com/SpenceKonde/ATTinyCore
- Then in the Tools menu -> Development Board -> Board Manager, search for Digistump AVR Boards and install the package. After successful installation, select the Digispark board (Default – 16.5mhz) in the Tools –> Development Board menu.
- Connect the board with a USB cable and the libusb-win32 devices item should appear in the Device Manager and the Digispark Bootloader item when expanded. It is possible that drivers will be installed when the board is connected.
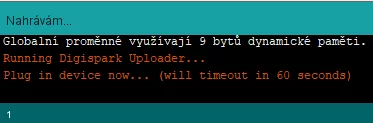
It is also important to note that before each programming of the board, the board must be disconnected from the USB port and connected only at the moment of programming, otherwise the program will not be uploaded to the board. The Arduino IDE will let you know the exact moment of connection immediately after compilation: